Many think that starting seeds is only a matter of sticking them in the soil and waiting for them to sprout. While that might be the case for certain varieties, it is not for all. A seed is a sack of dormant baby cells waiting for the specific conditions to begin a new life.
Killing seedlings is not uncommon among gardeners. The key is to keep on trying to reach the desired result. To cut to the chase, let’s look at how to start seeds in detail.

Why start seeds?
There are many reasons why one would prefer to start their seeds.
- Seedling choices offered by the stores are limited. Gardeners like to try new varieties, and many grow things that bring up memories.
- Saving money is another reason you may choose to start seeds. The price of transplants adds up when one is growing to feed themselves.
- Getting a head start for the season. Most of the time, transplants are unavailable in the nurseries soon enough.
- Starting seeds is a therapy for gardeners. They get to wind down and enjoy the start of a new life away from the outside chaos.
Not all seeds need to be started
Starting seeds indoors is not for all crops. Root crops, such as carrots, prefer to be directly sown in the ground. Their root system is too delicate to withstand transplanting.
Other seeds germinate and grow fast, so starting them indoors seems to be a waste. Some examples are beans, cucumbers, and squash.
Read the packet
The seed packet is the identity card of the variety. It contains all the necessary information needed for proper dealing with it.
For more on what to look for on a seed packet, click here.
What you need to start seeds
1- The right medium
Using the right seed-starting soil is key to being successful. It ensures good germination as well as good growth. A good mix should have the following:
- Lightweight to allow the delicate stem to push through.
- Well-draining to prevent rot and dumping off.
- Balanced moisture retention between watering.
- Sterile to prevent the development of diseases and bug infestation.
Check out this post on how to make a good seed starting mix.
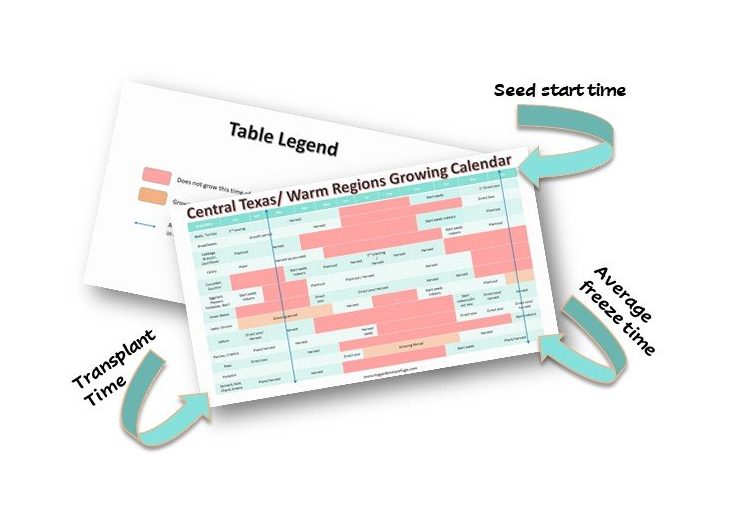
2- The right time for the right seed
Before starting seeds, you need to know the appropriate time for each given variety. Central Texas gardeners are lucky to grow all year round, yet, each crop has its own time.
Start cool-season crops in late August to early September. For warm-season crops, starting seeds during winter break is a good reference.
Always check the seed packet to know the exact time for each crop.
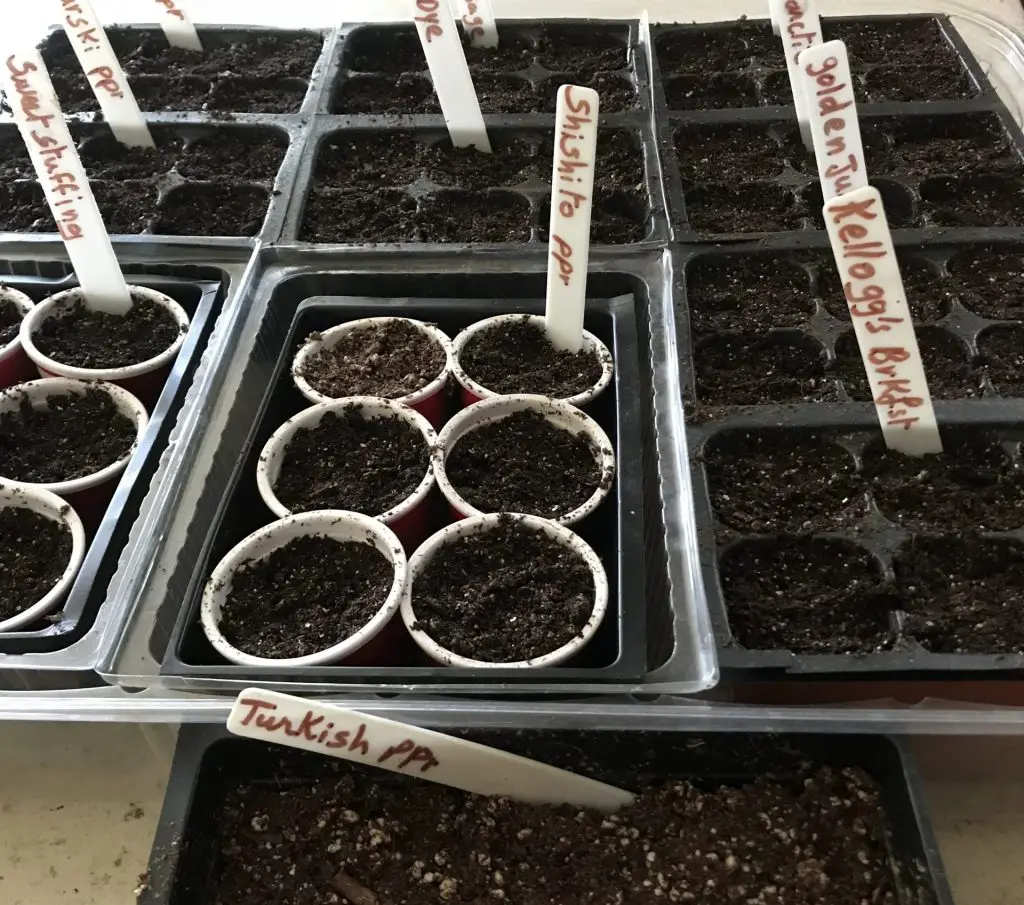
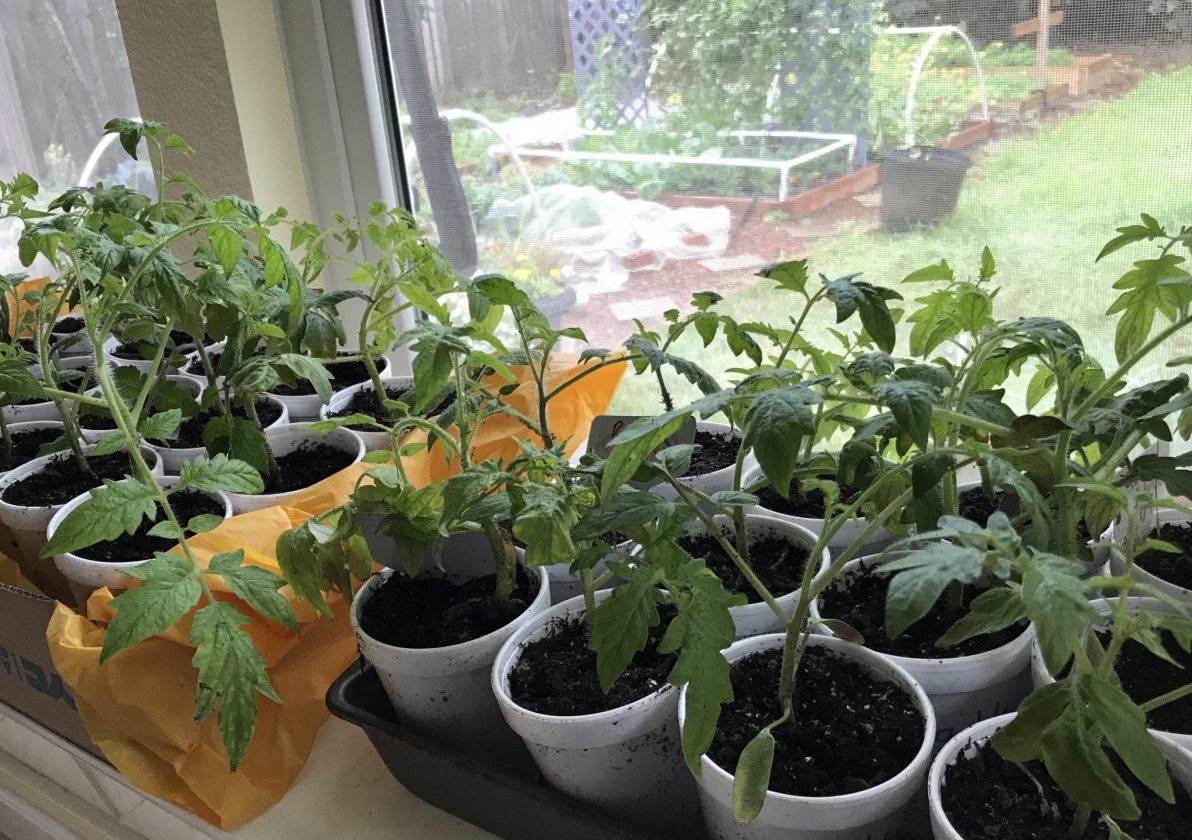
3- The right size pots
The size of the container depends on the seed’s size and the root’s tolerance to manipulation.
Cells are great for starting small seeds like tomatoes, peppers, and brassicas. Mouthwashing cups are also a great alternative.
Shallow take-out containers work great for tiny seeds that are hard to handle. Sprinkling them over the soil is all that’s needed.
For crops that do not appreciate transplanting, it is best to choose 3-inch pots or bigger. There will be enough room for the roots to expand. Yogurt containers, TP rolls, and root trainers are other options.
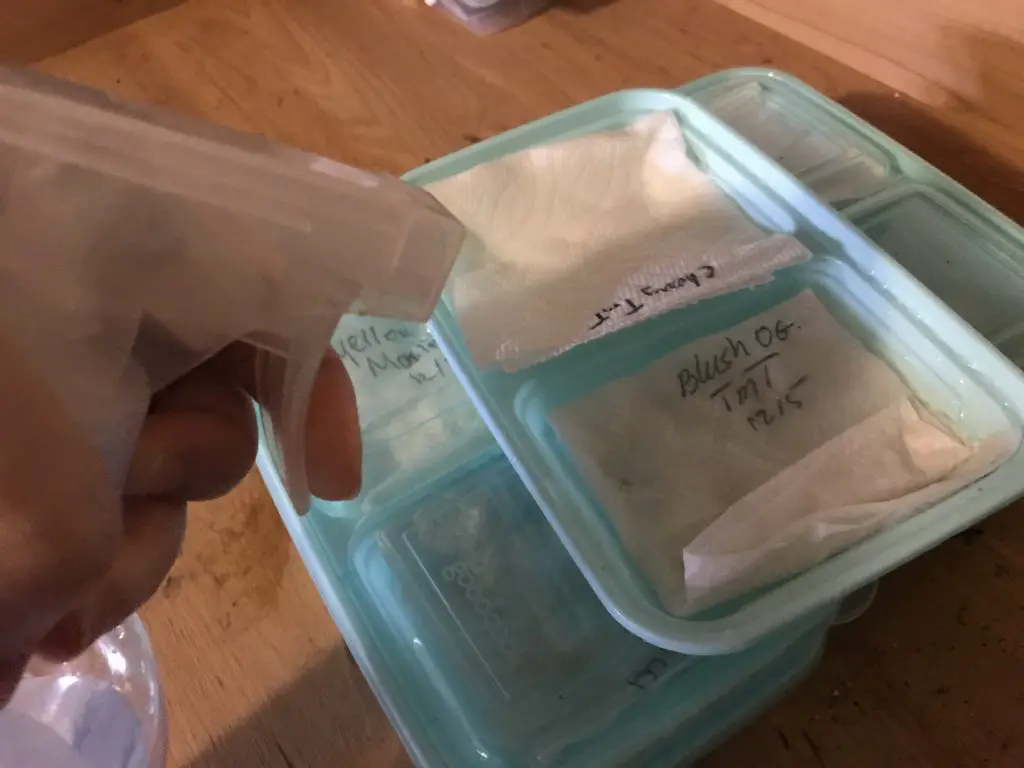
4- Germination test
This is a trick to test the germination rate of seeds.
- Lay paper towels in a container, then place seeds.
- Spray with water.
- Cover with a lid or a plastic cover, such as a plastic bag.
- Allow some air circulation by making holes or leaving a small opening.
- Don’t forget to label them.
- Place the container in a warm place.
- Keep an eye on them.
- Once the sprout appears, transfer the seeds to the starting cells.

5- Sow the seeds
- Premoisten the seed-starting mix.
- Fill the containers well.
- Gently, pat the soil down without compacting it.
- Using a pencil tip, make one to three holes twice as big as the seed. For bigger seeds, one hole per container is enough.
- Place a seed in each hole.
- Cover the seeds with soil.
- Water with a gentle stream of water.
Seedling care
How to water seedlings?
The starting medium must be moist when putting the seed in, and it should stay that way till germination. Avoid overwatering to prevent rot and fungal diseases. It is best to allow the soil to dry a little between each watering.
Once the seedlings emerge, start bottom watering by filling the draining tray. This method forces the roots to reach for water, making them stronger. It also prevents damping-off and mold, which are the most common problems.
It takes about 15 minutes for the water to moisten the soil. After that time has passed, make sure to drain the excess from the tray.
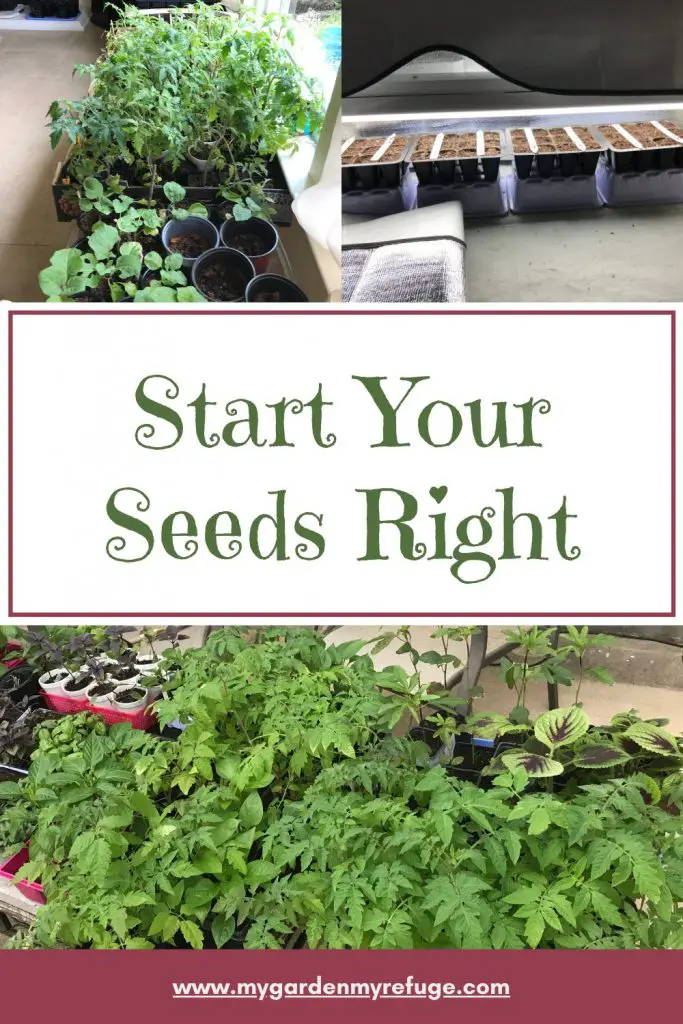
Grow Light
Light is an important factor in growing healthy seedlings. Some seeds need light to break dormancy. Others won’t need it until the first set of leaves appears to photosynthesize.
A windowsill with six hours of direct sunlight is great. Yet, you will have to keep turning the tray to make sure the plants grow straight up and do not lean to one side. In case natural light is not available, grow lights are the solution.
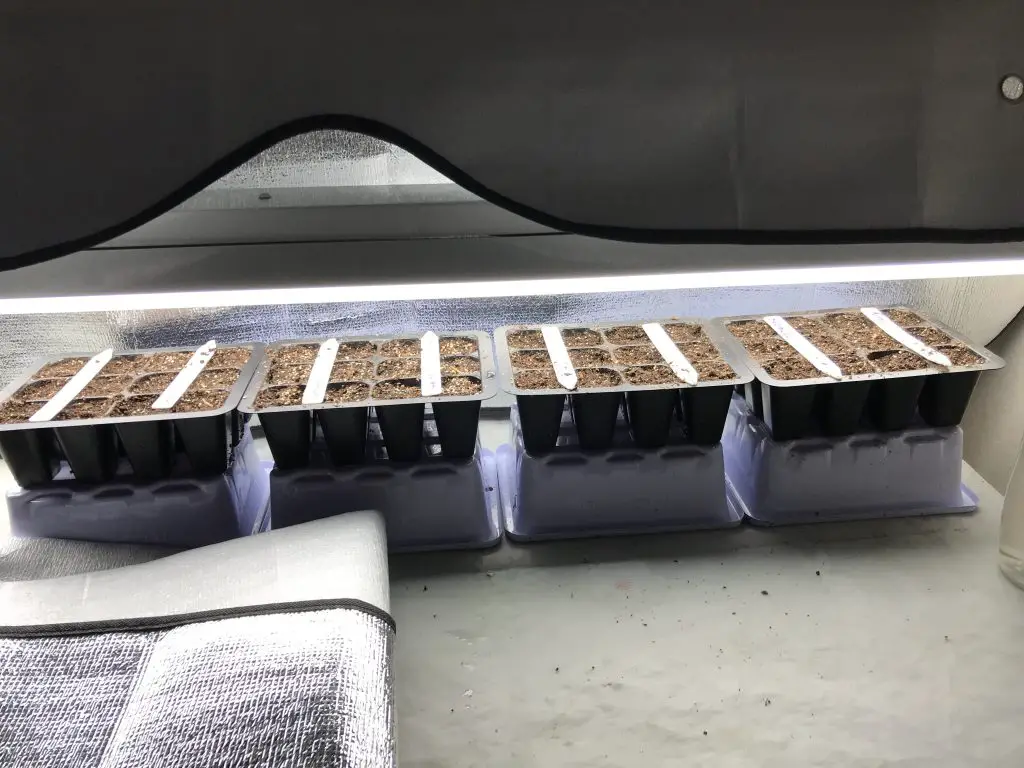
There are many commercial grow lights out there, but you can always make one yourself. A shop light on some sort of support system works well for beginners. Lights with 5000-6500 kelvins and 3000 lumens cast better daylight imitation.
Go to my other post for detailed instructions on how to make a grow light station.
Before germination, the containers should be as close as possible to the light. It will prevent the stretching of the stem, reaching for the light. As the plants grow and get too close to the lightbulb, move them down. You don’t want them burning.
To increase light intensity, use a sun shield to reflect more light on the seedlings.
How long does it take for the seeds to germinate?
The germination time varies. Some seeds germinate in four days, others take twenty days. Check the seed packet for the exact time.
How to speed up seed germination?
Here comes the importance of reading the seed packet. Different seeds take different time to germinate. Depending on how much of the necessary elements are provided, they may be fast or slow to break dormancy.
- Soak seeds for a few hours to rehydrate them. This applies mainly to seeds that are somewhat big like legumes.
- The germination test is also another way to speed up germination.
- Use a heat mat to imitate nature and trick the seed.
- For seeds that need light to germinate, avoid covering them with soil.
- Some seeds need a chilling time. So you might need to place them in the freezer for some time. Check the seed packet for instructions.
- Scarification is scratching the hard coat of some seeds. It is done to imitate natural weathering and help it soak moisture to germinate.
Seed starting problems
Spindly/ leggy seedlings
Leggy or skinny seedlings develop when the light is not strong enough. In some cases, this is remedied by burying the stem deep in the soil at transplanting time. However, avoiding the problem is best by using good grow lights.
Dumping off
Damping-off is a fungal disease that damages seedlings at the stem base. It chokes the plant and stops the flow of water and nutrients, resulting in its death. Overwatering is its main cause, so allow the soil to dry between each watering.
Discoloration
Some purpling or yellowing may appear on the seedlings’ leaves. That is likely caused by stress. They are either root-bound or ambient temperatures are not stable.
Overfeeding also can cause foliage discoloration. Seedlings do not need as much food as mature plants. Make sure to apply a low-concentration fertilizer.
How to fertilize seedlings?
At the germination stage, seedlings feed off their coating. The Cotyledons or the first leaves are part of the embryo. Once the true leaves develop, the seedlings will need supplemental feeding.
Liquid seaweed is the recommended fertilizer but at low concentrations.
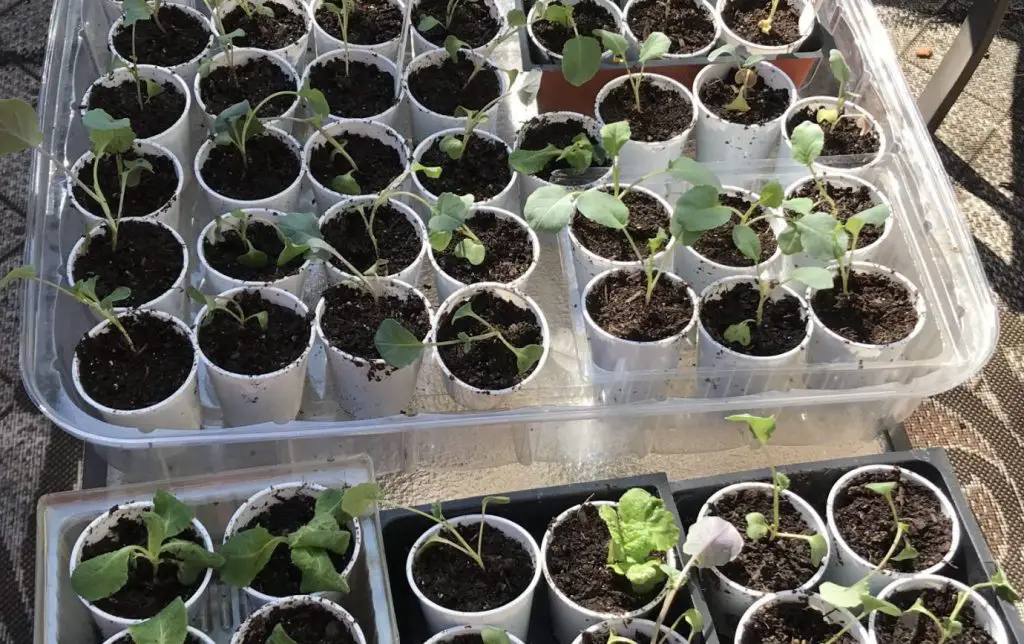
Potting up the seedlings
In a few weeks, the plants are looking strong, and the roots start pocking through the bottom of the pots. It is time to move them to bigger containers to give the roots more room to grow.
Choose a pot that is slightly bigger than the original. You don’t want to push the plants too hard, looking for water and nutrients.
How to plant seedlings?
1- Hardening off
Hardening off is the process of acclimating young plants to the natural elements. Usually, it takes seven days from start to finish.
- On the first day, bring the plants out and place them in dappled shade for an hour or two, then bring them in.
- The next day, keep them out an hour longer.
- Increase outside time each day until you reach a full day.
- On the last day, keep the plants out overnight.
- Once they spend a full day and night out, they are ready for planting.
2- Planting
Each crop has its specific planting requirements. It is best to check the growing guides for each crop. The following are general guidelines.
- Choose the right location with proper sun and soil needs.
- Dig a hole big enough to fit the root ball.
- Space the plants following the spacing chart.
- Add a slow-release fertilizer to the planting hole. Mix it with the native soil.
- Flip the plant over the palm of your hand, and tap at the base of the container to release the root ball.
- Carefully flip back and place the root ball in the hole.
- Backfill with soil patting firmly to eliminate air pockets.
- Water deeply.
- Place any needed support.